


The more you use the books, the slower you are, are you saved? The answer is: yes.
- 1. Organize the system or reinstall the system;
- 2. Upgrade hardware;
My friend called and said that her books were getting slower and slower, let me have a look. Well, when I went to her house, I found that it took a few years of notebooks. It’s only strange if it’s not maintained or slow! . The boot time took more than 2 minutes, oh my god, using this book really requires a high level of self-cultivation to sit and wait slowly. I can’t bear this kind of afternoon tea rhythm, it’s so slow to open the webpage! Insert a USB flash drive, and the drive letter will appear after 2 minutes. You will feel that the whole world is slow during this process. I really admire and admire her, books can still be used like this. After finishing the system, it is still slow. Forget it, just reinstall the system. After reinstalling, the notebook is a little easier to use. After half a year, she called me again (I have helped her get this notebook several times) and said Books are slow again…

That won’t work! I’m very busy, I can’t always do this! Treating the symptoms like this does not cure the root cause. Just give her a showdown, you’d better spend some money to upgrade your books to a lower level, only in this way can the problem be completely solved. Books can be upgraded by hardware. You can increase the memory or replace the hard disk to improve the performance of the book. And among them, the effect of replacing the hard disk of the old notebook will be more ideal. Hey, if you have a friend, you will say that you are not right! Isn’t it better to increase the memory! Yes, before the emergence of SSD solid state drives, upgrading the memory can indeed improve the performance of the notebook, but after the emergence of SSD, replacing the old notebook HDD mechanical hard disk with an SSD solid state drive, the performance improvement of the notebook will be better and more obvious than increasing the memory. ! In order to be more convincing, I will use this to demonstrate an example operation below.
First of all, it is not difficult to replace SSDs. Friends who want to upgrade their books but don’t know how to start, can follow my steps. Pay attention to some details of my operation. First of all, let yourself calm down. Of course, it’s best to take a bath and change clothes. This is not because of the sense of ritual or other, but to release the static electricity on the body, so as not to damage the internal circuits and components of the notebook during the subsequent operation. . Of course, you can also touch the wall directly to discharge static electricity, the effect is actually the same.
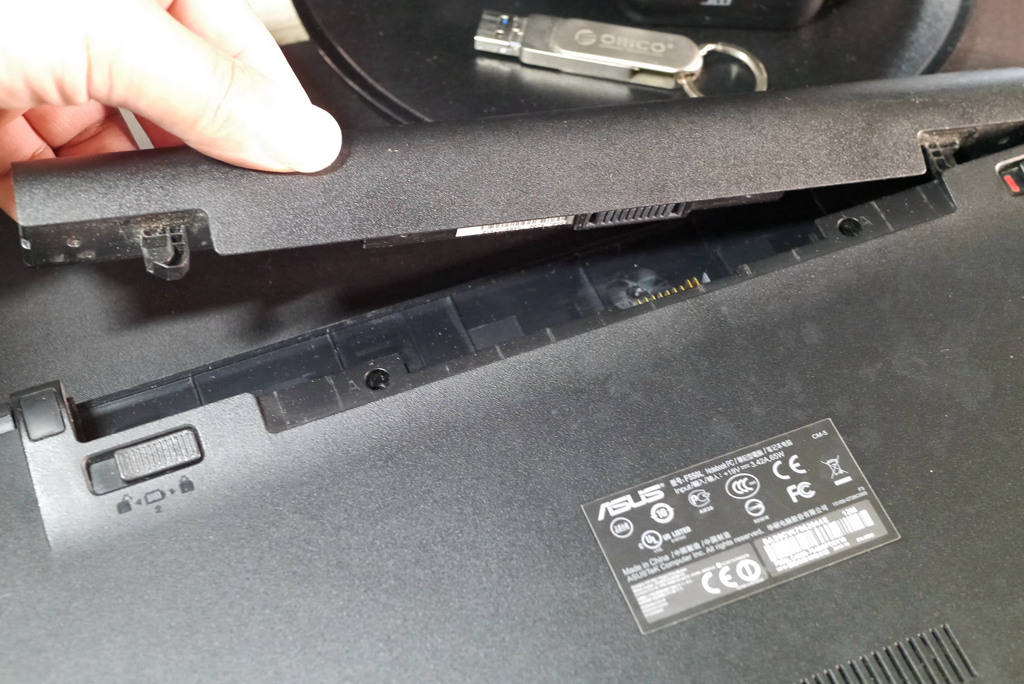
Before starting to disassemble, make sure that the notebook is completely shut down and not in standby state, then unplug the power cord and remove the battery module from the notebook. These operations are to completely power off the notebook. Electronic products are most afraid of short circuits, static electricity and so on!
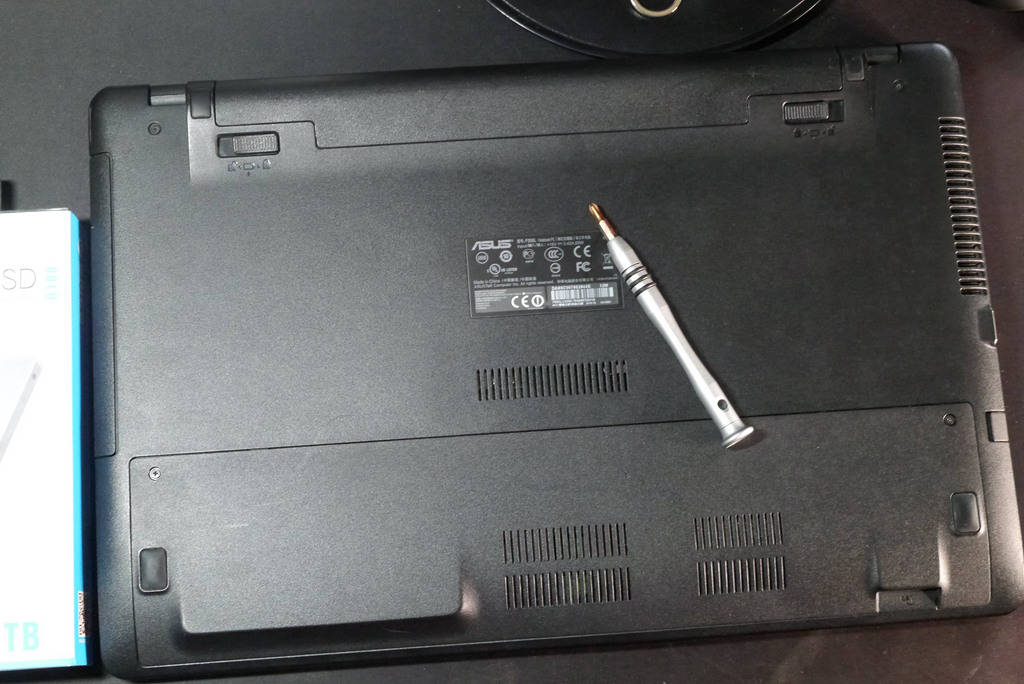
Then put the notebook inverted and lay it flat with the bottom of the notebook facing up (before operation, it is best to put a soft pad under the operating platform to prevent the notebook A panel from scratching). Observing the bottom of the notebook, there is usually a small independent panel window fixed with screws. The location of this window is the installation location of the notebook’s hard disk and memory.

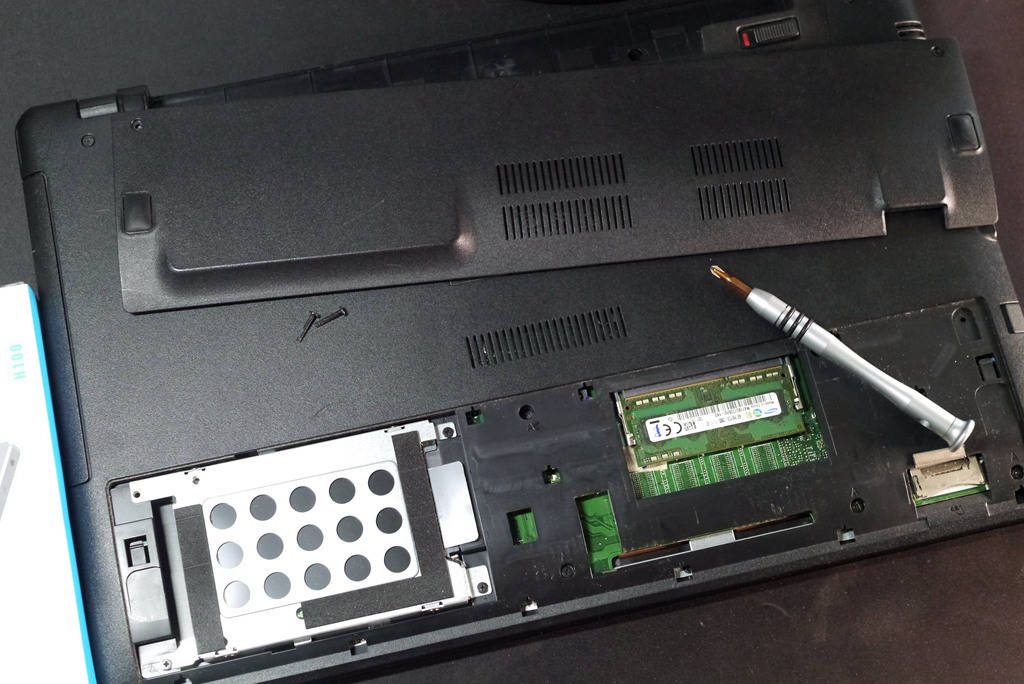
Sure enough, the notebook memory is another slot. Upgrading the memory means that the original replacement has to be thrown away. The effect is effective but the cost is higher, and the replacement of the memory will also cause version problems and compatibility stability. Therefore, under normal circumstances, I do not recommend upgrading the memory.
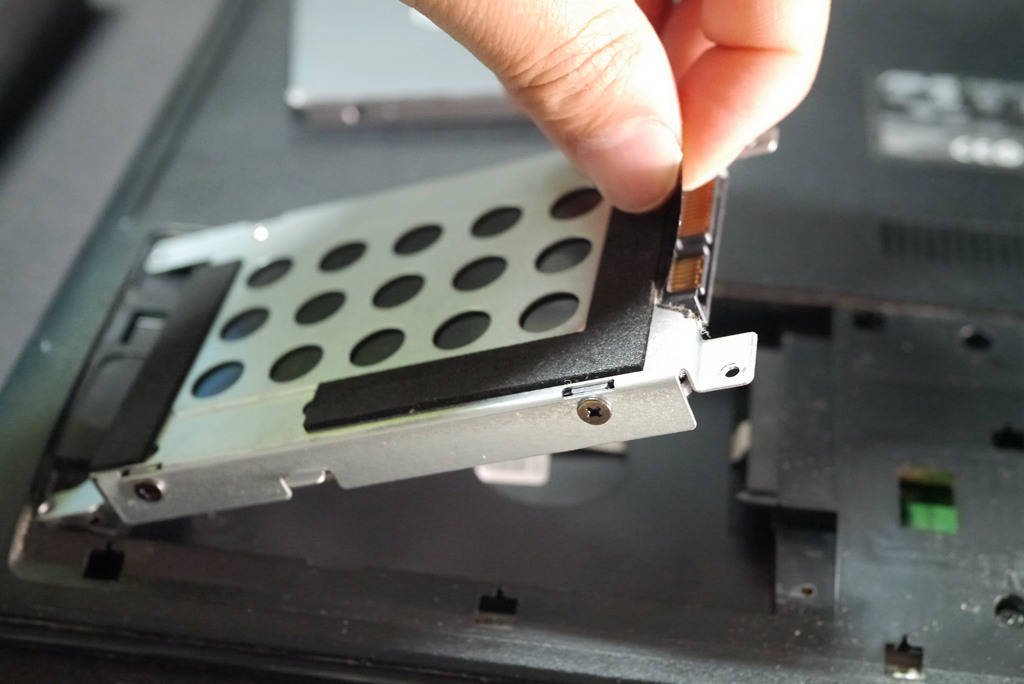
This position is the hard disk position, you can see that the hard disk position uses insulation reinforcement protection. Before disassembling, you must see the position and direction of the hard disk socket, and use a screwdriver to remove the fixing screws. Then use a little force to remove the hard disk in the opposite direction of the socket.
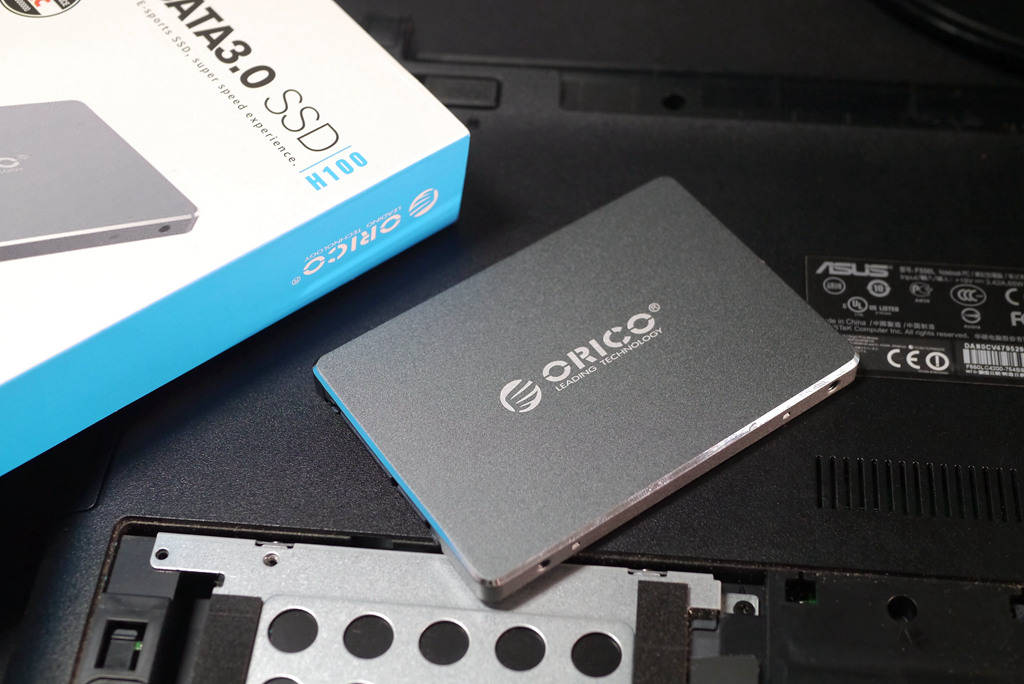
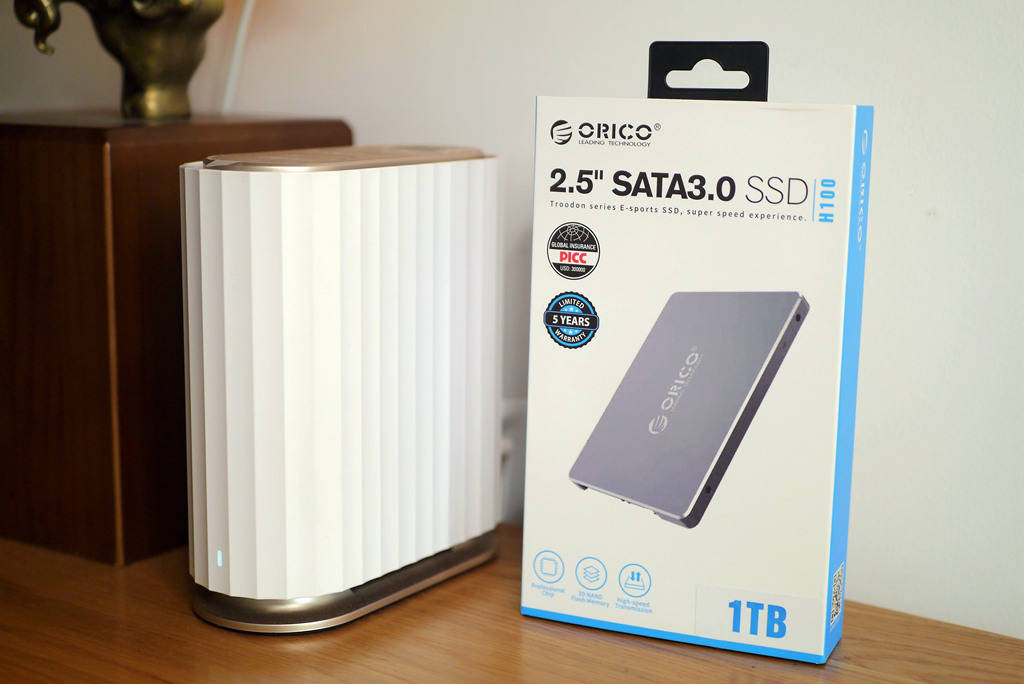
Well, the SSD solid state drive replaced this time is ORICO’s Xunlong series H100. There are several considerations for choosing this brand of SSD.

- 1. High cost performance, pay attention to activities, there will be great discounts;
- 2. The 5-year warranty is the most important thing to replace and repair;
- 3. Fast speed, both reading and writing have reached 500M/S;
- 4. 3D NAND flash memory TLC particles, stable and durable;
- 5. Aluminum alloy shell, fast heat dissipation, sturdy and durable;

From the appearance point of view, this ORICO Xunlong series of SSD solid state hard drives are very good in physical workmanship. Because it is for friends to upgrade and warranty reasons, so this time I will not disassemble it to see the internal materials and workmanship.
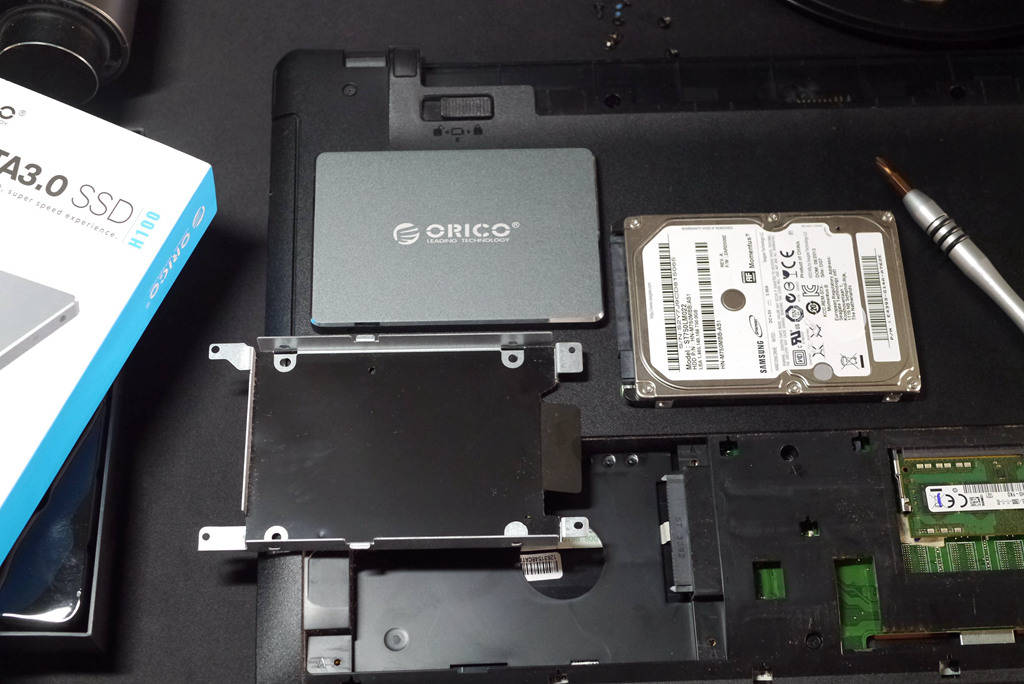
Disassembling the hard disk is very simple. One thing to pay attention to is to observe the installation direction of the hard disk, especially the direction of the socket. The socket direction of different brands of notebooks is roughly the same, but there are some differences.
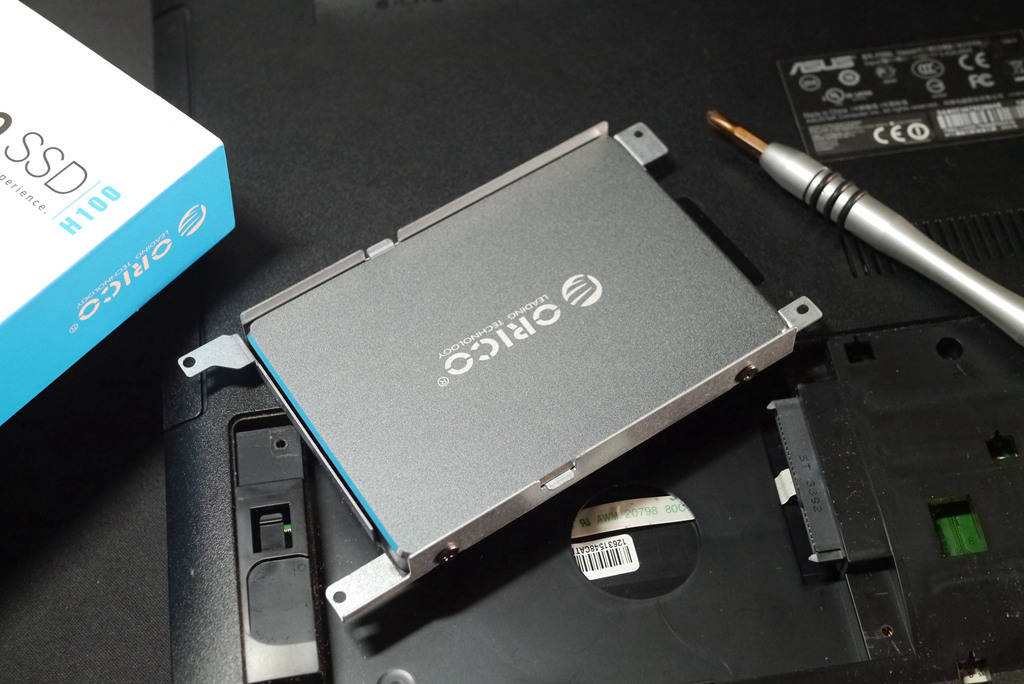
Fix the SSD to the hard drive bracket as it is. When screwing the screws, be sure to locate one of the screws first, and then screw the other diagonally, do not lock it, so that diagonally can be better fixed in place, this method is suitable for fixing screws of any product, including replacing car tires!
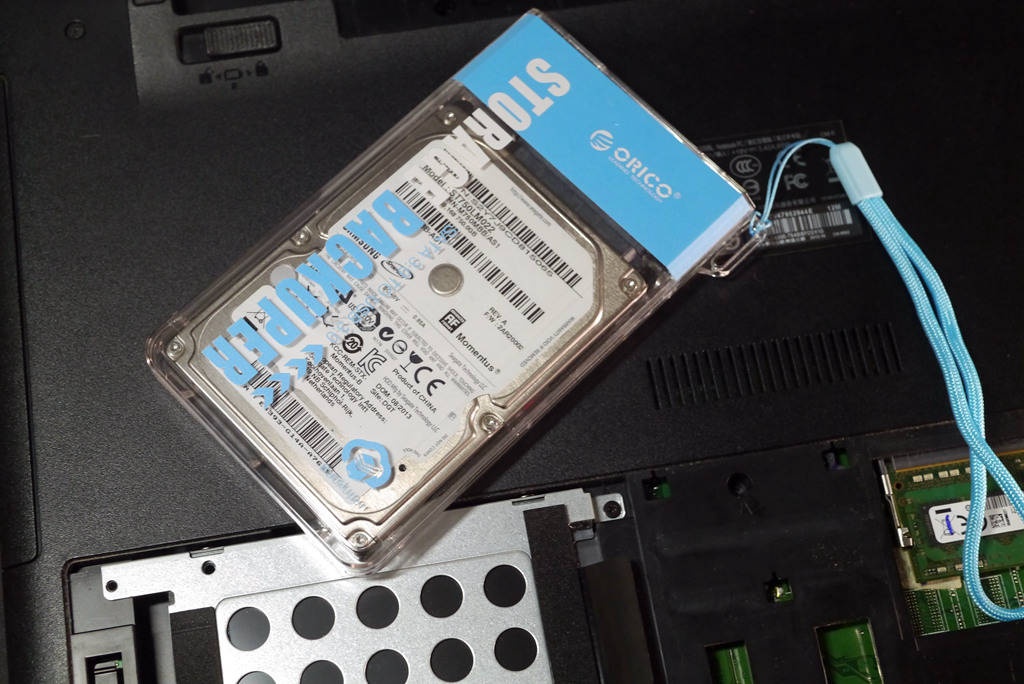
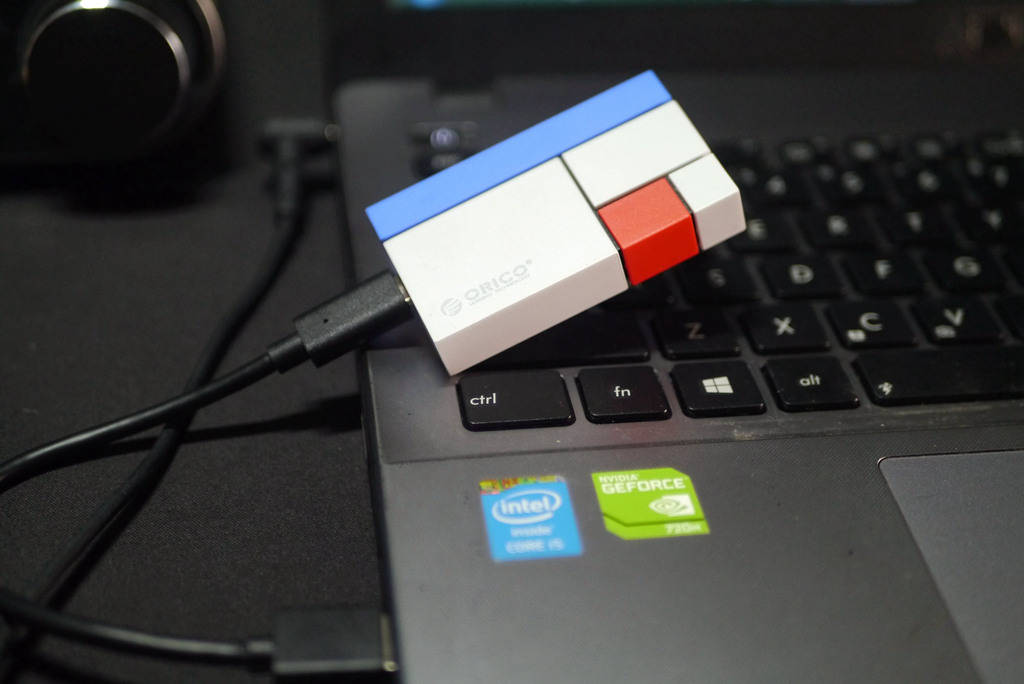
The replaced old hard drive can also be fully utilized. For example, add a hard drive box or this more advanced “mobile phone backup treasure”, and it will become a very useful mobile hard drive. Compared to upgrading the memory, upgrading the hard disk is more cost-effective! After installing the SSD, restore the back cover of the notebook, put the battery back in the notebook, and plug in the notebook’s DC power supply (must be plugged in, the performance of the notebook battery is basically not very good, and the subsequent system installation will take a certain time) , Now the new system installation is started.
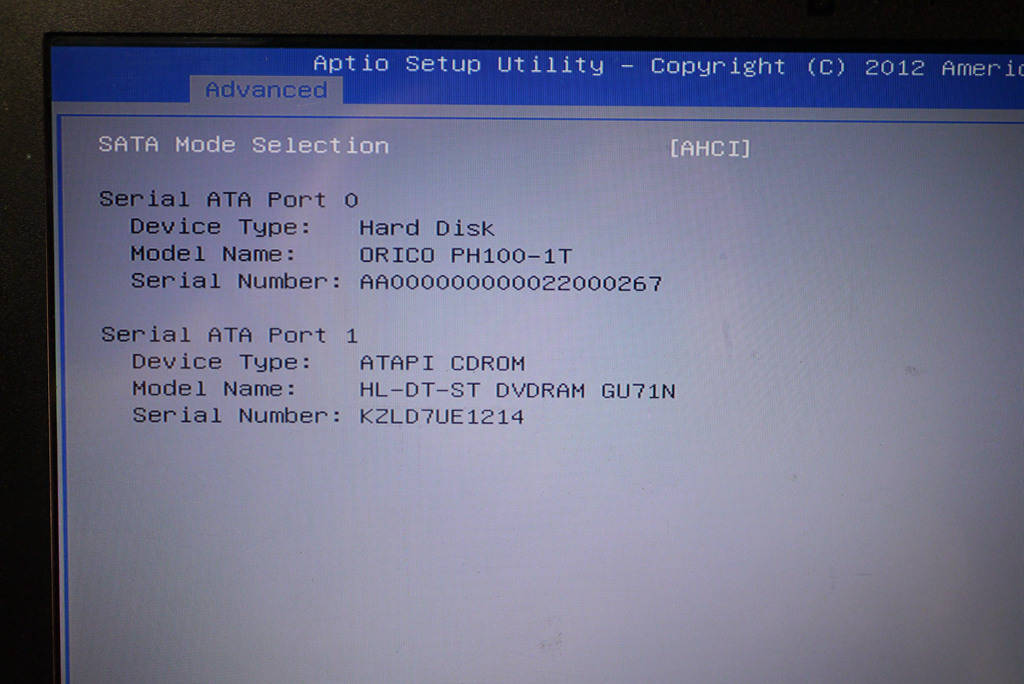
Before the system is installed, press F2 (most books are this key) to enter the BIOS to open the AHCI setting operation (AHCI (Serial ATA Advanced Host Controller Interface) Serial ATA Advanced Host Controller Interface/Advanced Host Controller Interface). Under the guidance of a number of companies, an interface standard jointly developed by a number of companies, which allows storage drivers to enable advanced serial ATA functions). AHCI is turned on because the highest IDE standard is 133m/s of IDE5. Therefore, in order to meet the SSD speed requirements, you must turn on the 150MB/S or even higher speed requirements supported by AHCI! Whether SSD performance can be fully utilized is very important and critical. Then you can install the WIN system by partition!
Install the pre-prepared WIN system through the U disk PE. The process is very simple. In the PE system, the SSD can be partitioned, formatted and 4K aligned.

When booting, press ESC to enter the startup disk, and be careful not to make a wrong selection.
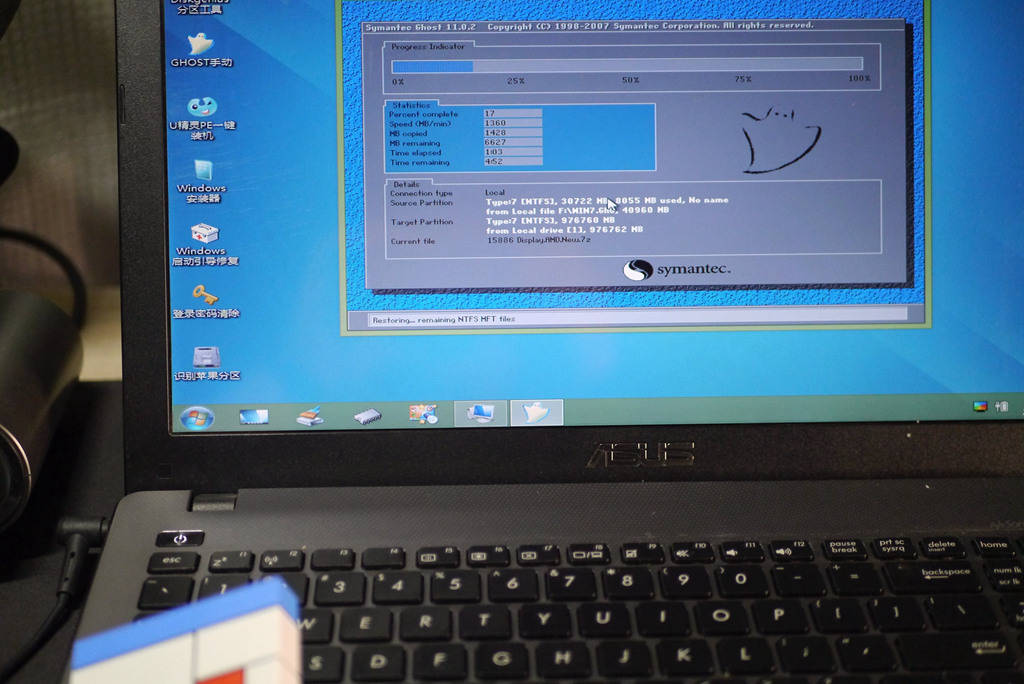
PE one-key GHO installation of WIN system is currently the easiest way, basically one-key automation can be achieved, it is really convenient. However, such GHO files will be more or less implanted in third-party software or have security vulnerabilities. It is recommended to install genuine anti-virus software immediately after the system is installed for full detection and uninstall all software applications except the system before proceeding. Genuine installation. Of course, the safest way is to install the genuine WIN system, which is up to you to choose.
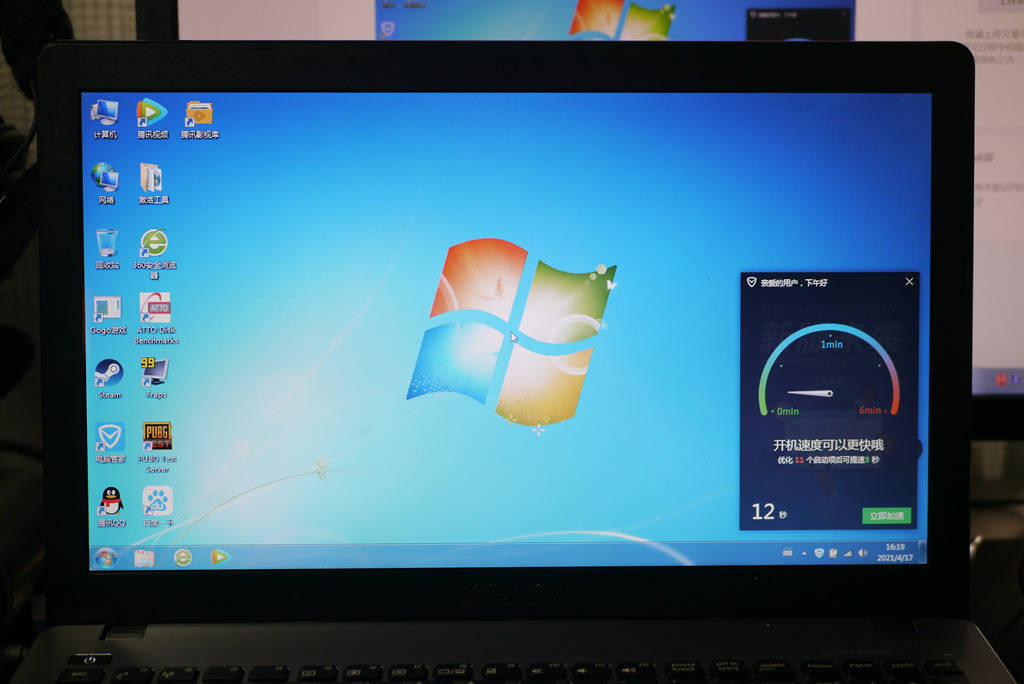
After replacing it with an SSD solid state drive, the system boot time is more than 2 minutes before the replacement, and now it can enter the system desktop in 12 seconds. This is the most intuitive and visible improvement brought by the SSD solid state drive. Even if more applications are installed later, the system startup time will not exceed 20 seconds after one year or two. This improvement is comprehensive, especially when using large software such as PS to open large PSD files or enter games, open web pages, etc., there will be obvious improvement changes compared to the previous ones.
Just replacing an SSD, there is such a big improvement, why? In order to let everyone see the reasons for the increase in books more intuitively. So I conducted some random tests on the protagonist, ORICO Xunlong SSD H100, so that everyone can have a more comprehensive understanding of the true performance of the current SSD.
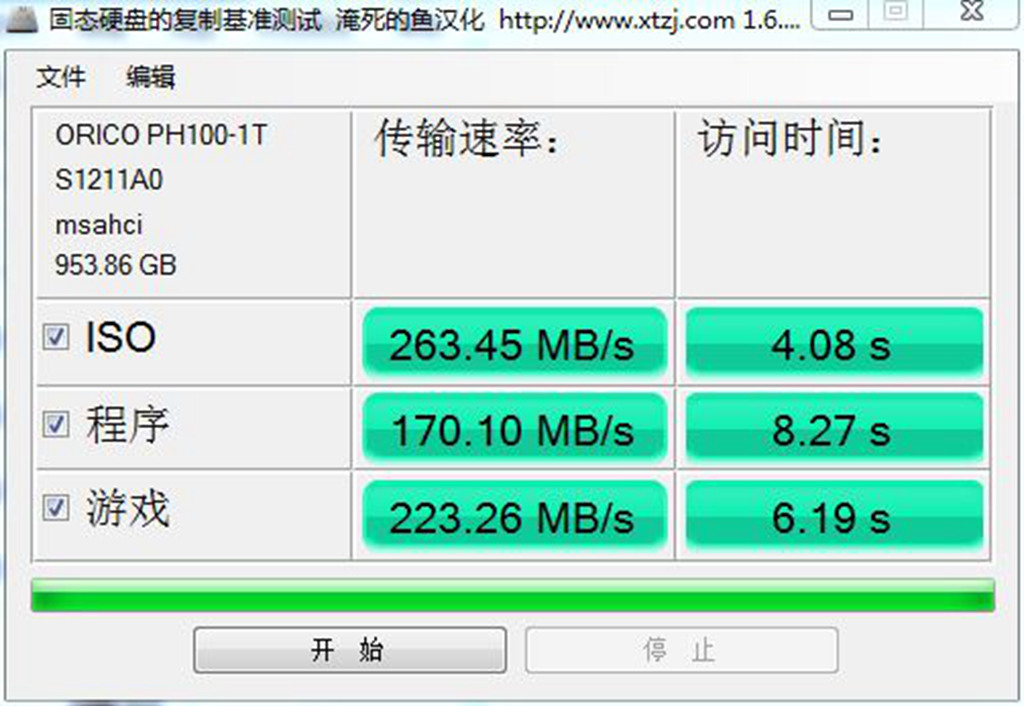
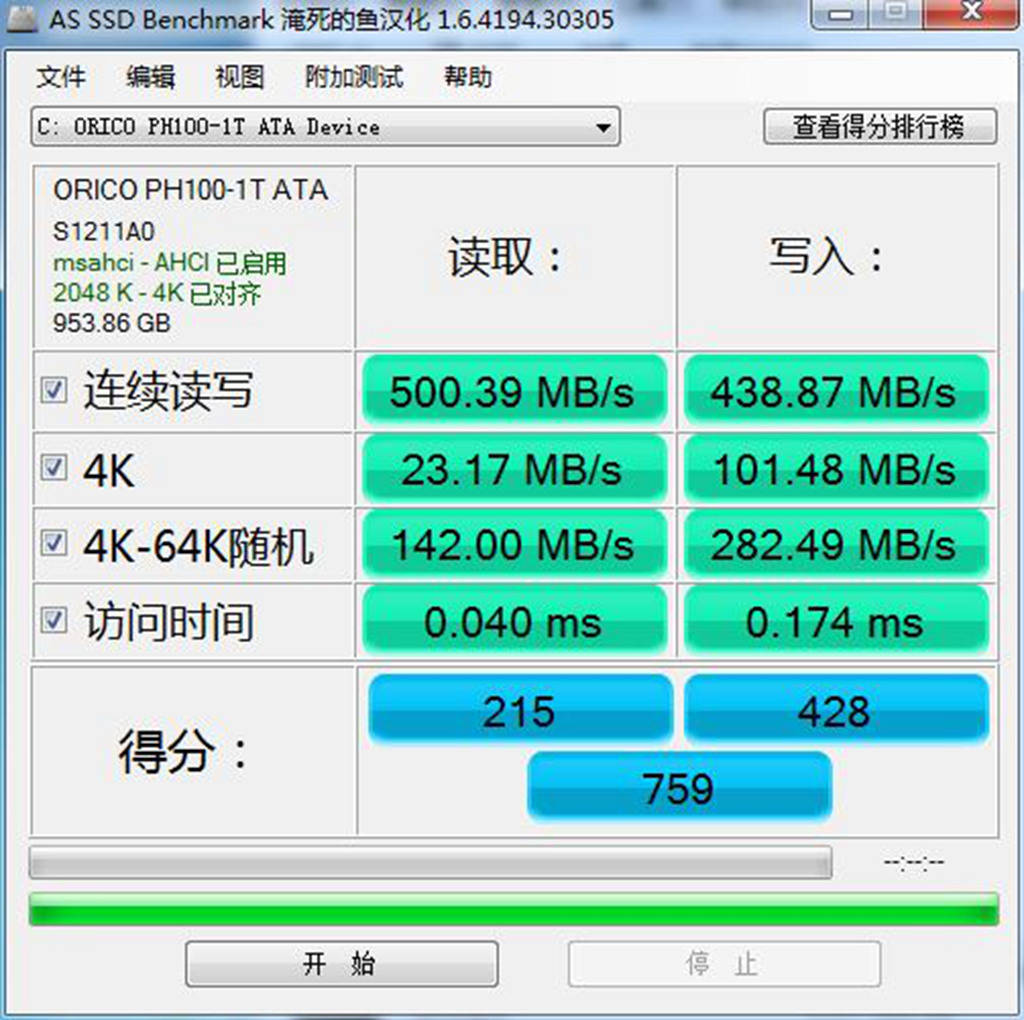
As tested by AS SSD Benchmark, the AHCI has been activated this time, the 4K of the newly installed ORICO Xunlong H100 has been aligned, and the SSD capacity is 953.86GB. AS SSD has a random continuous reading speed of 500.39MB/s and a writing speed of 438.87MB/s. Compared with the official data, its value is slightly lower, but the reading and writing speed is also very gratifying (the test hardware system application environment is different, resulting in The results will fluctuate). Random read and write performance of 4K and 4K-64K is also very impressive. By simulating the data test of ISO files, applications, and game running in daily applications, its performance on this old book is also remarkable.
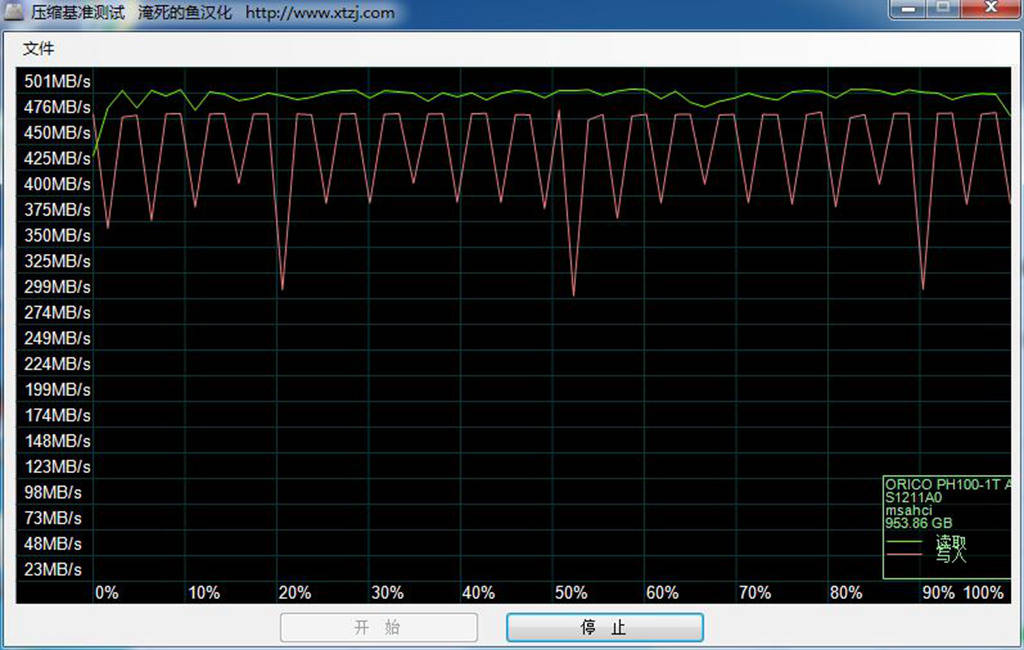
The compression benchmark test performed well, and the running process was stable and consistent.
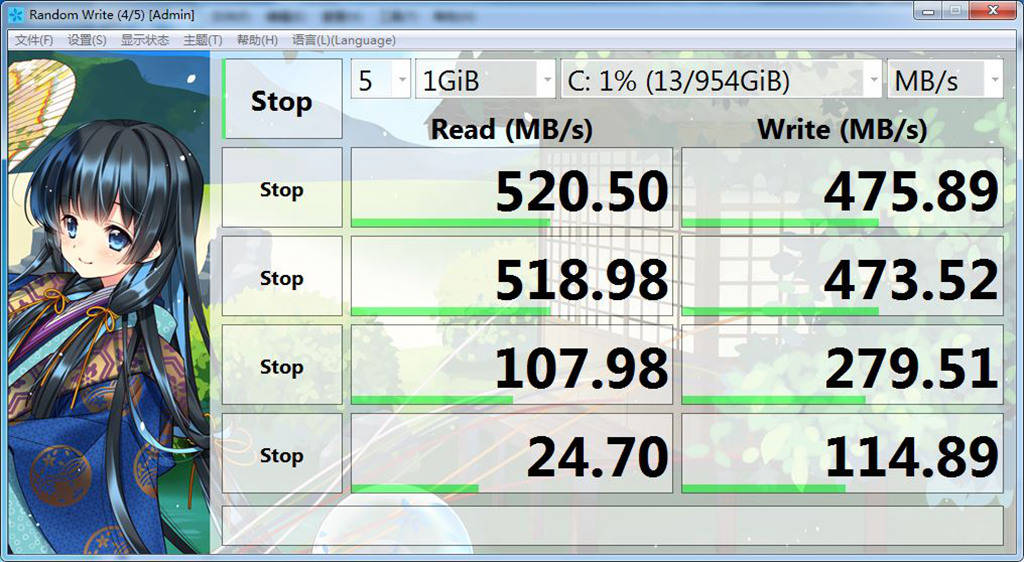
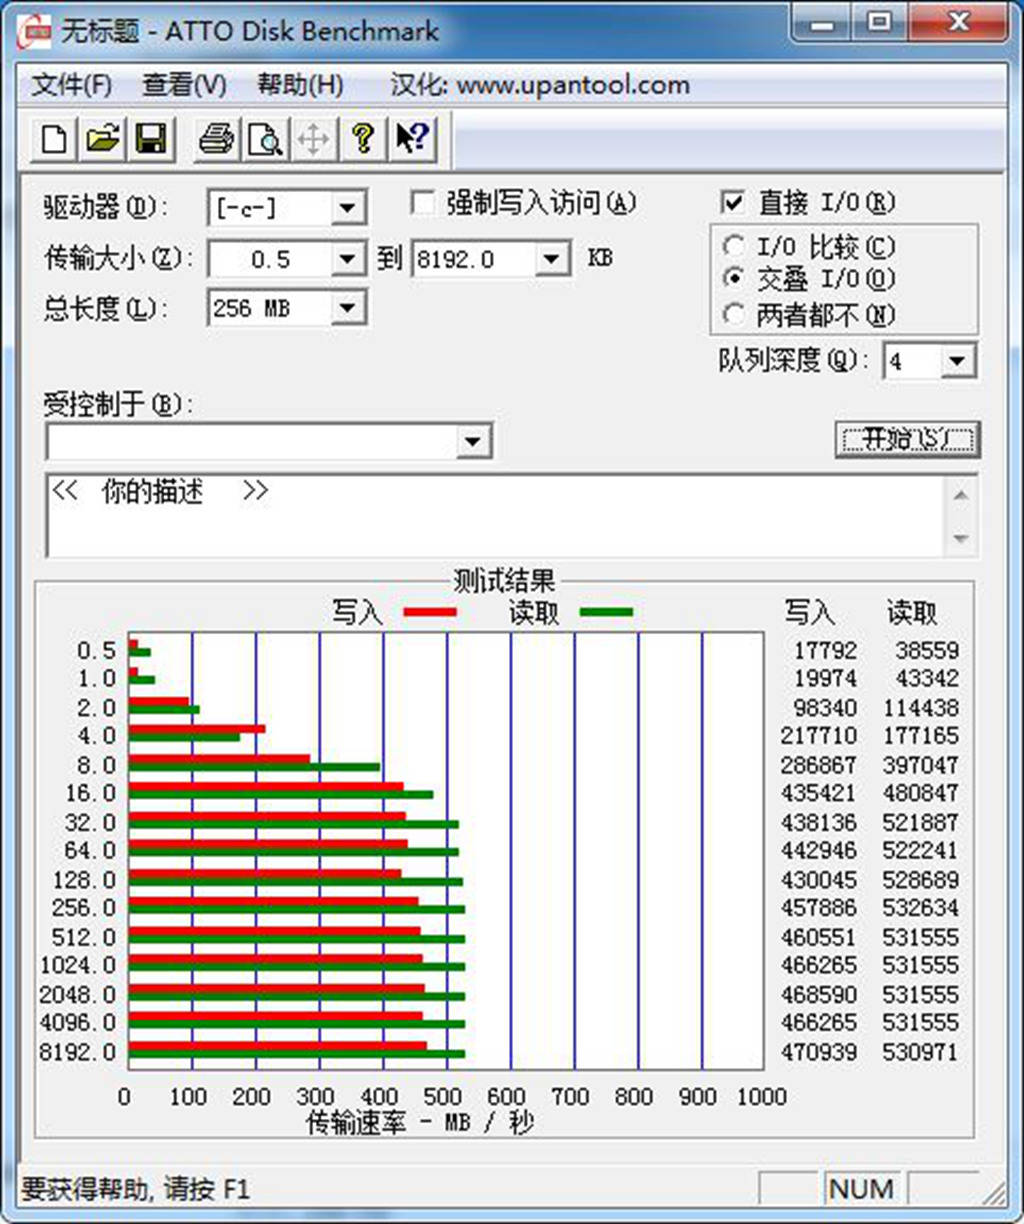
Then there are two other classic hard disk test softwares. The random test results are close and the data performance is excellent. The reading reached 530MB/S and the writing reached 470MB/S, which is basically close to the official value.

The old and newly installed SSD webpage loading test, open multiple webpages at a time, the operation process is smooth, the webpages are basically opened in seconds, compared with when they first got it, it is completely different from the world.

After personal testing, this old friend of my friend, with the blessing of the new SSD, has no problem playing games above 10G. Of course, limited by the performance of its GF 720M graphics card, its frame rate is still not enough for real players when playing large games.

The online video test is also very smooth, the audio and video are synchronized, and the progress is pulled randomly, all in one step and instant.
From the system startup to the software detection and the actual operation test of web pages, games and videos, the effect of this SSD upgrade is very obvious and very successful. As ordinary workers, money is hard-won. Doing the biggest thing with the smallest price is right. Friends who want to upgrade their notebooks can also follow this step. If there is anything unclear, you can leave a message after the text, and I will reply as soon as possible. Through this upgrade, I found that my Lenovo Personal Cloud T1 will also be upgraded. Adding an SSD of the same ORICO Xunlong H100 to it is a good choice.


You must log in to post a comment.